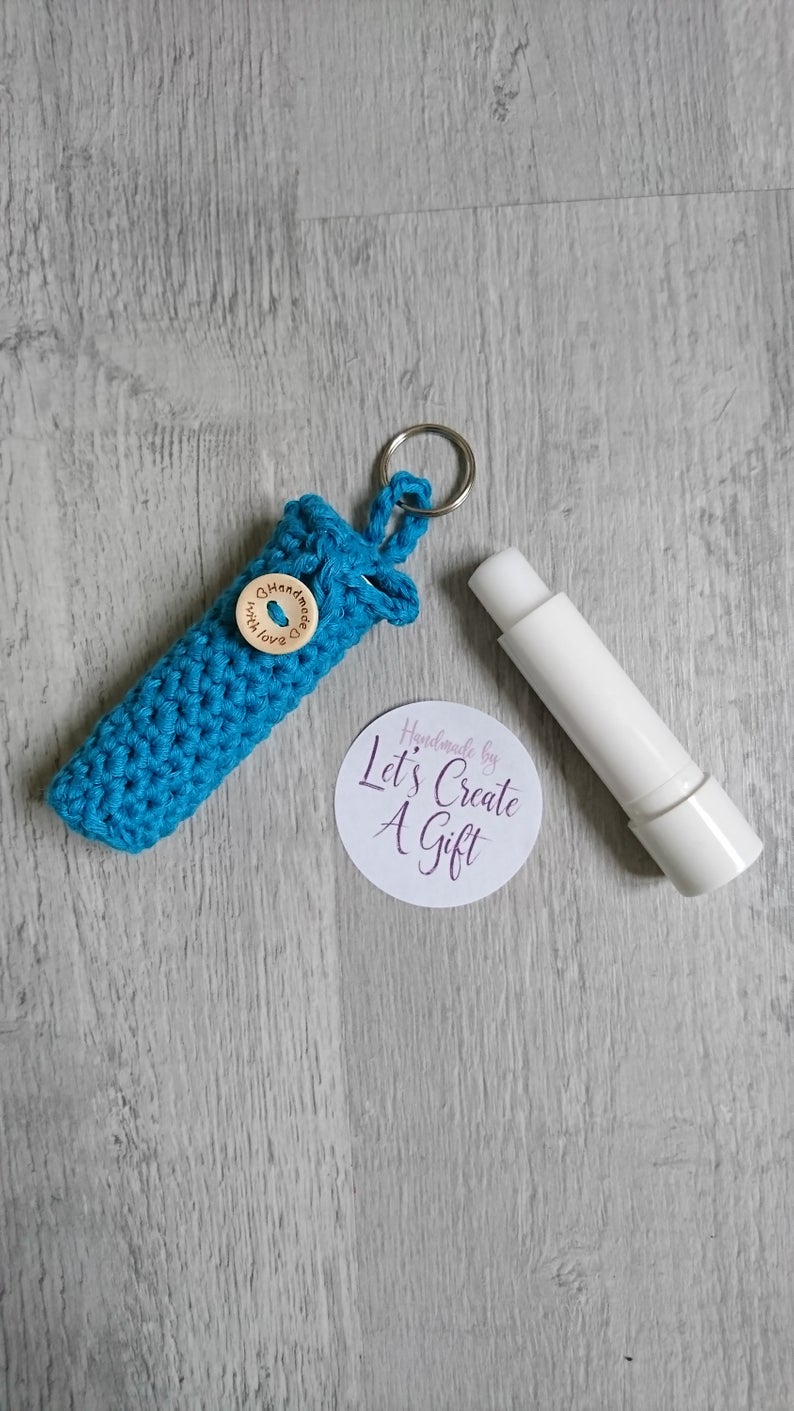
If you’re anything like me then you’re probably always having to buy lip balm and lipsticks when you’re out and about and then later finding half used ones in coat pockets, kitchen drawers and the glove box! So, where better to keep your lip balm safe than on your keys (unless you loose your keys pretty often too which is also me!). This is a super simple pattern and it’s a really quick make, ideal for those yarn scraps you have left over from other projects. I used a 100% cotton yarn for these so that they would be a bit more hard wearing as I find that acrylic blends have more stretch in them.
If you’d like an Ad free version in an easy to view, and printable, PDF please consider purchasing the pattern from my etsy or ravelry store (link at the end of the blog)

What I used
DMC Natura just cotton 4ply in your chosen colour
3mm Crochet hook
Stitch marker (optional but makes it easier) – https://www.etsy.com/uk/LetsCreateAGift/listing/843046161/stitch-markers-for-crochet-and-knitting?utm_source=Copy&utm_medium=ListingManager&utm_campaign=Share&utm_term=so.lmsm&share_time=1620135083465
Scissors – I use these – https://www.etsy.com/uk/LetsCreateAGift/listing/968811212/stork-embroidery-scissors-in-silver-gold?utm_source=Copy&utm_medium=ListingManager&utm_campaign=Share&utm_term=so.lmsm&share_time=1620135040283
Needle for weaving in ends
Small button
Keyring
Terminology
CH – Chain
SC – Single crochet
SC2tog – single crochet 2 together. You can use standard or invisible decrease for this.
You can either start with a magic circle or you can chain 4 and join. I prefer the magic circle as it can be pulled tighter. If you struggle with the magic circle try one of these 3 super easy ways on this quick video tutorial
https://www.youtube.com/watch?v=EPBHAXenbsU
The main part of the holder is worked in continuous rounds for as many rounds as you need to make the height of your lip balm. Using a stitch marker will help keep track of the rounds or you can just keep going until its the height you want. If your chosen lipstick or lipbalm is wider than the average then you’ll need to make the base slightly bigger. This is done by increasing for a second time (*1sc, 2sc* repeated around to give you a total of 18stitches before working in back loops only. You may also want to increase your lid by 2 stitches to start with)
Magic circle R1 – 6 sc into the magic circle
R2 – 2 sc in each stitch around (12), slip stitch to join.
R3 – Working into BACK LOOPS ONLY. Ch1, 1 sc in each stitch around working into back loops only (12). This will form the bottom and your work now begin forming the holder.
R4 – R23- 1 sc into each stitch around working in continuous rounds. (Button will be sewn on at around round 21, if you plan to make your holder taller you may want to put your button on later)
R24 – Ch1 and turn. 8 sc.
R25 – Ch1 and turn. sc2tog, sc 4, sc2tog (6)
R26 – Ch1 and turn. sc2tog, sc 2, sc2tog (4)
R27 – Ch1 and turn. Sc2tog, sc2tog (2)
Sew on your button at approx. round 21. you can pop your stitch marker in so that your work doesn’t unravel. This will help you know how long to do the chain on your lid. I used a few strands of the cotton yarn so that the colour matched the holder.
Ch8 and join to the other side of the end of the lid. (you may need to change more or less depending on the size of your button which it’s why it’s helpful to have your button on already). Tie off and weave in your ends. Attach your hard to the back of the holder at the base of the lid (the row before your 8sc). Chain 8 and reattach to make the loop on the back of your holder and add your key chain.


